DIY Faux Lime Wash: An Affordable Room Makeover
A room makeover doesn’t have to cost a fortune to look high-end. Sometimes, all it takes is a brush, a couple of paint colours, and a little patience. Check out how Velda from @stylingmyinterior updated her space using a clever painting technique and just a few of the right ProRenovator tools.
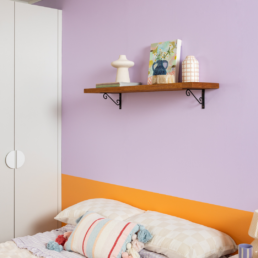
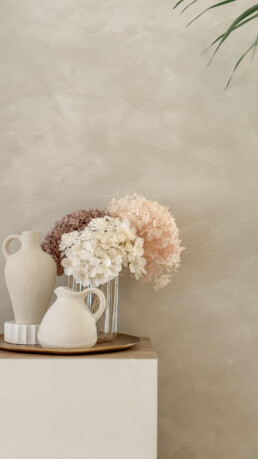
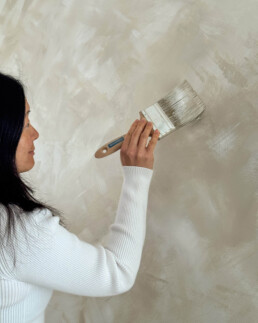
The result? A gorgeous faux lime wash effect that leaves your walls looking textured, designer-inspired, and full of depth without the price tag or hassle of traditional lime wash! Ready to give it a go? Follow the step-by-step guide below to see exactly how Velda transformed her space into something fresh and full of character.
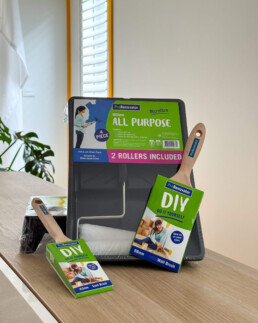
What You’ll Need
- ProRenovator Brushes
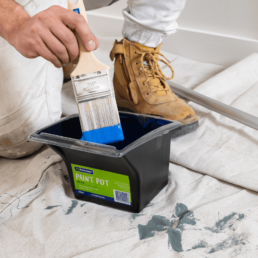
- ProRenovator Paint Pots with Liners (x2)
- ProRenovator Measuring Cups
- Two paint colours in separate pots (choose shades that complement each other)
- A little water
Planning & Preparation
First up, pick your colour palette! For a soft, dreamy vibe, go for two shades that are close together, think warm neutrals, gentle greys, or calming pastels. If you’re feeling bold, choose colours that really pop against each other. Try testing a small patch on the wall first to see how your choices play together.
Next, prep like a pro! Make sure your walls are clean, dry, and smooth, and protect skirting boards, trims, and floors with painter’s tape and drop sheets. A little extra prep now means your finished look will be polished, professional, and totally eye-catching.
How to Create the Faux Lime Wash Look
Step 1: Thin the Paint
Add a splash of water to both paint pots for a slightly looser consistency.
Step 2: Load the Brush
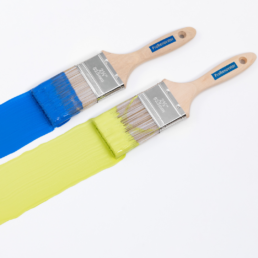
Dip one side of your Paint Brush into one colour, then flip and dip the other side into the second colour.
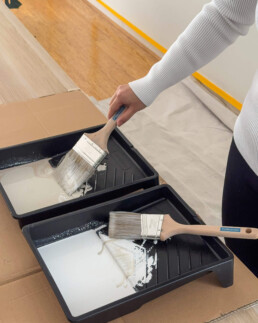
Step 3: Brush It On
Apply the paint to the wall in loose, criss-cross strokes. Keep layering and blending until you achieve the depth and softness you like.
Step 4: Perfect the Edges
You can use a smaller brush around trims and corners for a neat and tidy finish.
Why Try a Faux Lime Wash?
You’re the boss of your walls! Blend the strokes for a soft, dreamy look, or let more brush marks show for a bold, textured vibe. This technique is simple, affordable, and completely DIY-friendly adding subtle movement and a luxe, high-end feel to any room.
The End Result
With just two paints, a splash of water, and your trusty ProRenovator brushes, you can transform your space and give it a whole new personality. It’s proof that small touches can make a big impact, and that DIY can be fun, achievable, and beautifully luxurious. Affordable, creative, and uniquely yours that’s what DIY with ProRenovator is all about.


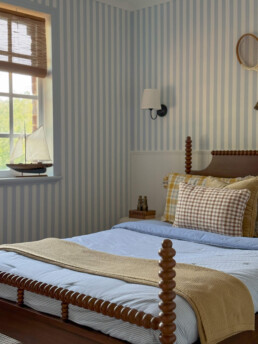
Looking for a fun way to add personality to your space without the cost or commitment of wallpaper? Stripes are a timeless design trick that instantly brings polish, charm, and a playful twist to any room. The best part? With a few ProRenovator tools, this project is budget-friendly, beginner-friendly, and totally achievable to do over the weekend!
What You’ll Need
- ProRenovator Roller Kit 270m
- ProRenovator Microfibre Mini Roller 7PK
- ProRenovator Paint Pot with Liner 100mm
- ProRenovator Metal Extension Pole 1.2m
- Painter’s tape
- Level or measuring tape
- Base paint colour & stripe colour
Planning & Preparation
Before you dive in, choose your stripe style! Want to make your ceilings feel higher? Go vertical. Hoping to stretch out a small room? Horizontal stripes are your best friend. Feeling bold? High-contrast colours like navy and white make a striking statement. Prefer subtle and sophisticated? Tone-on-tone shades can keep it soft but stylish.
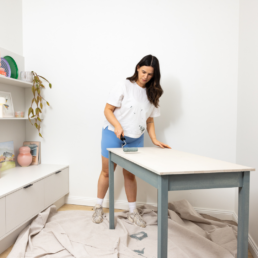
Now, let’s prep! Clear out your workspace so you’ve got room to move and nothing in the way or under your feet. Give your walls or cupboards a quick clean so they’re dry and dust-free. And don’t skip the tape, masking trims, skirting boards, and handles is the secret to making sure your painting looks sharp, clean, and totally professional.
How to Paint Perfect Stripes
Step 1: Map It Out
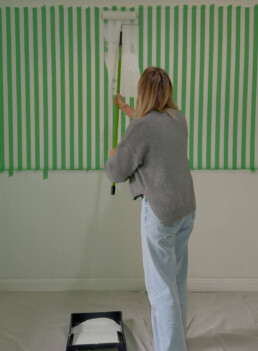
Use a quality painter’s tape to outline your stripes. A level can help keep them straight, or you can even use the tape’s width as your measurement.
Step 2: Seal the Tape
For razor-sharp lines, paint over the tape edge with your base colour first. This seals the tape and stops your stripe colour from sneaking underneath the tape.
Step 3: Paint the Stripes
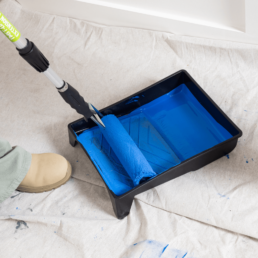
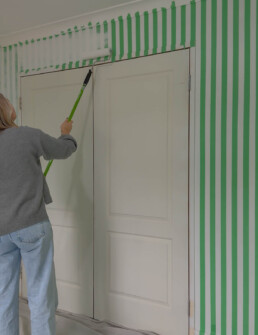
Roll on your stripe colour with the ProRenovator Microfibre Mini Roller it’s perfect for cupboards, trims, and smaller spaces. For those tricky corners and quick touch-ups, the ProRenovator Paint Pot makes painting a breeze. Tackling the full wall? Grab the 270mm Roller Kit with Extension Pole for smooth, even coverage and say goodbye to back strain while you paint like a pro.
Step 4: Peel & Reveal
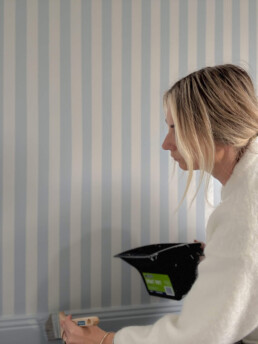
Gently pull off the tape for a clean satisfying reveal!
The Big Reveal
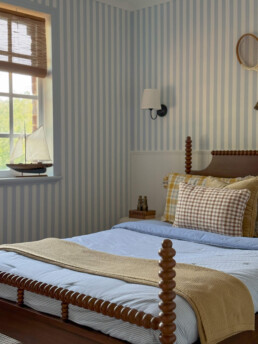
That’s it! With just tape, paint, and a few ProRenovator tools, you’ll have crisp, stylish stripes that make a big impact in any room. Affordable, fun, and full of personality! This simple paint hack proves you don’t need wallpaper to totally transform your space.
24 October 2025
How to Load a Paint Roller
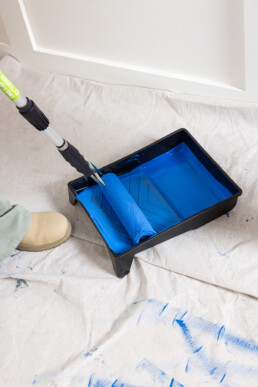
Hey there, DIY dynamo! Loading a paint roller might seem like a small step, but it’s a crucial one in your quest for a flawless finish. So, roll up your sleeves and let’s get that paint roller loaded.
Step 1: Prepping the Roller
Whether you’re using a full-size roller or a mini, the same steps should be followed to load them properly.
First things first! Before you load that roller, give it a little prep by rinsing it under water to eliminate any loose fuzzies.
Shake out the excess water.
Step 2: Prepare the Paint
Pour a generous amount of paint into your paint tray.
Step 3: Loading the Roller
Here comes the fun part! Dip the roller into the paint tray.
But hold up! You don’t want to submerge it completely. Just touch the tip of the roller into the paint.
Once you have a little bit of paint on the roller, use the paint tray grill to roll the roller back and forth. This allows the roller to soak up the paint and distribute it evenly. This is where the magic happens—watch your roller transform into a colourful sponge! The entire roller should now be covered in paint.
Pro Tip: Don’t Overload!
Less is more when it comes to paint rollers! Overloading can lead to a mess and uneven application. If you notice the roller dripping, simply roll it back on the tray until it’s just right.

Step 4: Time to Paint!
Now that your roller is loaded, it’s showtime! Find out how to paint a feature wall here.
Step 5: Clean Up
When the painting is done, make sure to clean your roller properly by rinsing it in warm, soapy water. By keeping your roller in tip-top shape, you’ll be able to reuse it for your next project.
And there you have it, superstar! Loading a paint roller is as easy as it gets!
Happy painting! 🎨✨
How to Load a Paint Brush
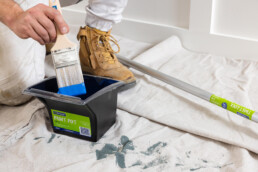
Hey there, creative genius! 🎨 Before you dive headfirst into your next painting project, let’s talk about a crucial skill that can elevate your work from “meh” to magnificent: loading a paint brush! It may sound simple, but the right technique can make all the difference. So, grab your brush, and let’s get started! Find out how to choose the right paint brush here.
Step 1: Prepare Your Brush
First things first! Soak your brush in an inch of water for 15 minutes prior to painting. This will help the paint apply more smoothly and evenly. Give it a little shake to remove any excess water.
Step 2: Pour the Paint
Pour the paint into a paint pot or bucket. Try not to overfill the bucket too much, a third of the way should be sufficient. You can always refill if you’re running low.
Step 3: Loading the Brush
Take your brush and dip it into the paint. Aim to immerse just the bristles about one-third of the way. You want enough paint to do the job but not so much that it drips!
Lightly tap the brush against the edge of the tray to remove any excess paint.
Pro Tip: Less is More!
Remember, it’s always better to start with a little paint. You can always dip again if you need more. This approach helps you maintain control and precision while painting.

Step 4: Time to Paint!
With your brush loaded and ready to go, it’s time to start!
Step 5: Clean Up Like a Boss
Once you’ve finished your masterpiece, it’s cleanup time! Rinse your brush in warm water and gently comb the bristles to remove any paint. Treat your tools with care, and they’ll be ready for your next creative venture!
And there you have it, painting superstar! 🌟 You’ve mastered the art of loading a paint brush, setting yourself up for painting success.
Happy painting! ✨
How to Stain a Floating Shelf
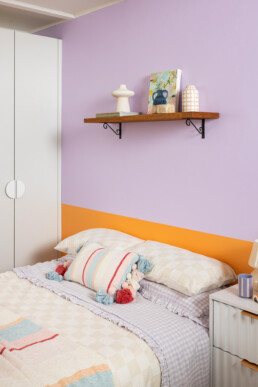
Hey there, DIY enthusiasts! 🎨✨ Ready to create a stunning statement piece? Floating shelves are not only a great storage solution, but they can look super chic with the right styling. Staining is an awesome way to enhance the natural beauty of wood. Grab your tools, and let’s dive in!
What You’ll Need:
- Floating shelf (for ease choose a raw timber)
- Wood stain (pick a shade that speaks to your soul)
- ProRenovator Paintbrush (to cover tight corners)
- ProRenovator Foam Mini Roller (for smooth sailing)
- ProRenovator Disposable Paint Tray (best for rolling)
- ProRenovator Paint Pot with Liner (best for brushing)
- Sandpaper (medium grit)
- Clean rags (to wipe away excess)
- Drop Sheet (to catch any drips)
- Sealer (optional, but recommended for durability)
Step 1: Prep Your Space
Start by laying down your drop sheet to protect your floor. Nobody wants a surprise stain on their favourite rug, right? We recommend setting up your shelf on a milk crate or small table so it’s easier to manoeuvre!
Step 2: Sand Away!
Your shelf may already be nice and smooth, but if not, make sure you give it a good sand before you start.
Step 3: Choose Your Stain
Pick a stain that will compliment the rest of your room.
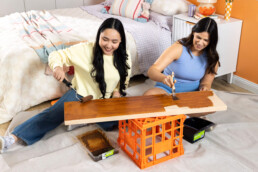
Step 4: Apply the Stain
Pour the stain into your paint tray and pot. Use your brush to apply stain around the sides and edges. Grab your foam mini roller and dip it into the tray. Foam rollers are the best choice when using anything oil-based, like timber stains! Start applying it in long, even rolls on the larger surfaces of the shelf. Let it sit for a few minutes, then wipe away any excess stain in circular motions using a clean rag.

Step 5: Let It Dry
Patience is a virtue! Let your shelf dry completely according to the stain’s instructions. Grab a snack, gossip with your bestie or even start planning how you’ll style your new shelf!
Step 6: Seal the Deal
If you want to ensure your masterpiece stands the test of time, apply a clear sealer once the stain is dry. This step adds an extra layer of protection and enhances that beautiful colour you just applied.

Now that your shelf is beautifully stained and sealed, it’s time to hang it up! Install it securely using brackets and then let your creativity shine by styling it with artwork, plants, or books. Your space is about to pop!
There you have it—your fun and easy guide to staining a floating shelf! With just a bit of effort and a splash of creativity, you can elevate your home decor game. So, roll up those sleeves, grab your supplies, and let’s make some magic happen! Happy staining! 🎉🖌️
What Is Cutting In and Why You Absolutely Need To Do It!
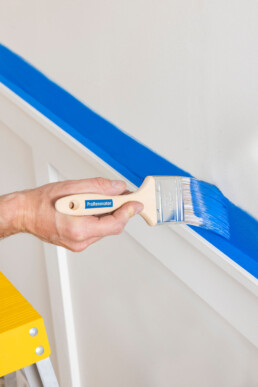
Hey there, DIY dynamo! 🎨 Ready to take your painting skills to the next level? Today, we’re diving into a crucial element of painting: cutting in! If you’ve ever wondered what this mysterious technique is and why it’s essential for achieving that flawless finish, you’re in the right place. So, grab your brush, and let’s cut to the chase!
What Is Cutting In?
Cutting in is a paint brush technique used to create clean, sharp lines along edges and corners, where walls meet ceilings, skirting boards or window frames. Cutting in creates a “frame” for your roller, allowing you to fill in the larger areas with ease.
Why Bother With Cutting In?
You might be asking, “Why can’t I just slap on the paint without cutting in?” Great question! Here’s why cutting in is a must-do:
1. Sharp, Clean Lines: Cutting in allows you to achieve those beautiful, crisp edges that elevates your painting from amateur to artist!
2. Prevents Mess: When you cut in, you can avoid getting paint on your trim or ceiling. This means less frustration and time wasted trying to fix mistakes. Who doesn’t want that?
3. Better Control: Using a brush gives you more control in tricky areas than a roller would.
How To Cut In Like a Pro
Ready to master the art of cutting in? Here’s a step-by-step guide to help you nail it every time:

Step 1: Gather Your Supplies
Before you start, make sure you have:
- ProRenovator Sash Brush: This is your best friend for cutting in! For beginners, an angled brush allows for better control and precision.
- Your Chosen Paint: Get that colour ready!
- Painter’s Tape (optional): If you’re a bit nervous, tape can help guide your lines and give you extra piece of mind that your trims won’t get paint on them.
Step 2: Load Your Brush
Dip your brush into the paint, making sure to only cover the bristles about a third of the way. Tap off any excess paint to avoid drips. You want just the right amount for precision! Find out how to load a paint brush here.
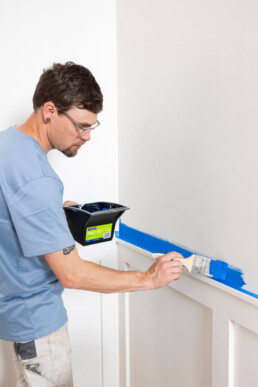
Step 3: Start Cutting In
1. Paint a 40-50cm line on the wall away from the edge. This will help unload some paint.
2. Angle your brush on a 45-degree angle with the tip pointed towards the edge and carefully cut in right to the edges. There is no need to put extreme pressure down on the brush when cutting in.
3. Using the flat side of the brush, evenly spread the remaining paint.
Step 4: Roll Away!
After you’ve cut in all your edges, it’s time to grab your roller and fill in the rest of the wall. You’ll be amazed at how the finished product looks with those sharp lines framing the roller work!
And there you have it! Cutting in may seem like a small step, but it’s one that can make a massive difference in your painting project. With practice, you’ll be able to create those clean, professional lines with ease.
How To Paint a Feature Wall

Hey, creative souls! 🎨✨ Are you ready to turn that boring wall into a show-stopping feature? Painting a feature wall is an awesome way to add personality and style to any room. So, gather your supplies, put on some music, and let’s make your walls sing!
What You’ll Need:
- Paint (choose your favourite colour)
- ProRenovator 230mm Walls & Ceilings Kit (includes two rollers and a tray)
- ProRenovator Wall Brush (for cutting in those edges)
- ProRenovator Pole (to reach high walls and ceilings)
- Masking tape (to keep lines sharp)
- Drop sheets (to protect your floors and furniture)
- Sandpaper (to prep your wall)
- Sugar soap (for removing grime and dust)
Step 1: Choose Your Colour
Do you want a bold, energetic hue or a calming, serene shade? Grab some paint samples and see how they look in your space at different times of the day. Once you find “the one,” you’re ready to roll!
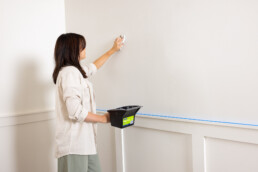
Step 2: Prep Your Wall
Let’s get that wall ready for its big moment! Start by giving it a gentle sand to smooth out any imperfections. Next, give it a clean with sugar soap to remove excess dust and grime. Lay down your drop sheets to protect your floors and furniture from splatters—no one wants a paint mess!
Step 3: Tape It Up
Time to bring out the masking tape! Apply it along the edges where your feature wall meets other walls, ceilings, or trims. This step is crucial for those crisp, clean lines that make your wall look professionally done. Take your time—great things come to those who tape!
Step 4: Cutting In
Use your brush to cut in around the edges of the wall and any power points. Find out how to cut in here.

Step 5: Roll Your Paint On!
Now for the fun part! Pour your paint into the tray and grab your roller. Start rolling in small sections, starting in the middle and rolling up and down. Remember: two coats are essential to get that colour on point so once your paint is dry, repeat Steps 4 + 5 for the second coat. Remember to check your chosen paint can for recommended drying times.
Step 6: Remove the Tape
It’s time to peel off the tape and reveal those super straight lines – so satisfying!

Now you should have a stunning finish! Your feature wall is now a vibrant backdrop for creativity! Style it with artwork or put your favourite chairs in front of it to make the space truly yours. Think about lighting, too—a well-placed lamp or fairy lights can really bring it to life!
And there you have it—you’ve turned a plain space into a vibrant canvas that reflects your personality. Happy painting! 🎨✨
Size Matters: How Do I Know Which Paint Brush to Use?
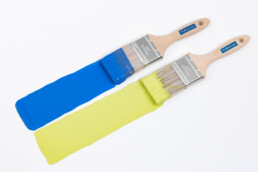
When it comes to painting, choosing the right brush size can make all the difference. So, how do you know which one is right for your project? Don’t worry, we’ve got you covered!
The Brush Breakdown: Small, Medium, Large—Which One’s for You?
When it comes to brushes, size affects how much paint you can carry and how much control you have.
Small Brushes
The smallest ProRenovator brushes are 25-38mm wide. Small brushes are perfect for detail work, trims and are ideal for most furniture upcycling projects.
Medium Brushes
This is the versatile go-to brush, usually around 50-63mm in size. A medium-sized brush can handle most interior painting tasks, from trims to walls and ceilings. They are great for cutting in around edges and corners. It gives you the right balance between coverage and control—big enough to get the job done without being too bulky for tight spots.
Large Brushes
Got a big surface to cover? A large brush (75mm or greater) is your best friend! Whether you’re painting large sections of a wall or exterior surfaces, the bigger the brush, the more paint it can hold. This means you can cover more area in less time. However, keep in mind that larger brushes are less precise, so if you don’t have a lot of painting experience, maybe go down a size.
Paint Like a Pro!

Now that you know the ins and outs of brush sizes, you’re ready to paint like a pro. Remember, the key to a smooth and professional-looking finish is using the right tool for the job. So, next time you’re standing in the paint aisle, take a second to think about your project and select the right size.
And remember, when it comes to painting: Size matters… but so does a little creativity! Happy painting!
Fun Painting Projects for the Kids
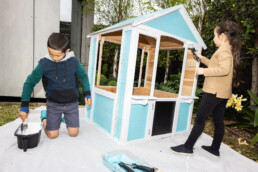
There’s something magical about the world of kids and paint. Whether it’s adding a playful splash of colour to their cubby house or creating a whimsical nursery wall, painting is a fantastic way to nurture creativity and bond with your little ones. Plus, the memories you create during these projects will last long after the paint dries!
Painting a Cubby House
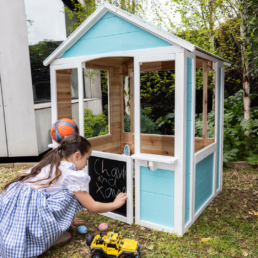
A cubby house is a child’s sanctuary—a place for play, imagination, and adventure. And what better way to bring that space to life than with a coat of paint? Whether it’s in the backyard or a cozy corner of their room, painting a cubby house is a fun project that can transform a simple wooden structure into a magical hideaway.
Step 1: Choose the Right Paint
For outdoor cubby houses, you’ll want weatherproof paint that can stand up to the elements. Look for paints designed for exterior use that are durable and long-lasting.
Step 2: Prep the Cubby
Before you and your little ones start painting, prep the cubby house:
- Clean the surface: Dust and dirt can affect how well the paint adheres. Wipe down the surfaces with a damp cloth and let it dry completely.
- Sand any rough edges: If your cubby house has rough wooden spots, lightly sand them to avoid splinters.
- Undercoat if needed: If you’re painting a raw wooden cubby house, apply a coat of undercoat to ensure the paint goes on smoothly.
Step 3: Let the Kids Get Creative!
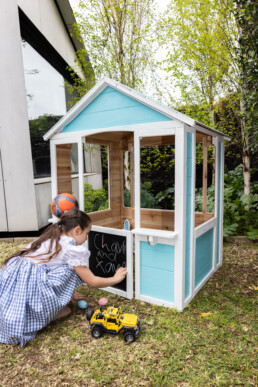
This is where the fun begins! Let your kids choose their favourite colours and get creative. Here are a few fun ideas to inspire them:
- Bold colours: Bright primary colours like red, blue, and yellow create a lively, cheerful environment. You can paint the cubby house in solid colours or go for stripes for a modern touch.
- Personalised details: Let your child’s name shine! Paint their name on the door or create a sign above the entrance.
Stencilling a Nursery Wall
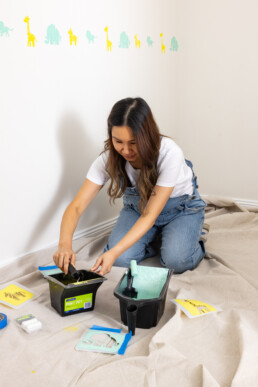
There’s nothing like painting a nursery wall to create a warm, welcoming atmosphere for your little one. Whether you’re going for soft pastels or bold patterns, stencils allow you to make a statement while keeping things playful and fun.
Step 1: Pick the Right Colours
Choose a colour palette that complements the overall vibe of the nursery. Soft tones like yellow or mint green are perfect for creating a peaceful, calming environment.
Step 2: Stencilling the Wall
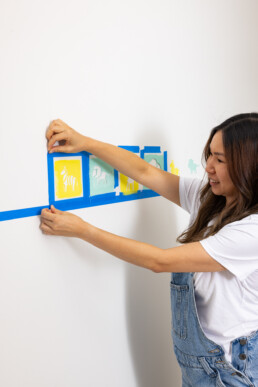
Stencils are a game-changer when it comes to wall art—easy to use, versatile, and fun for kids! You can choose from a wide range of stencils, from simple shapes like hearts and stars to more intricate designs like animals or nature scenes.
To stencil:
1. Tape the stencil to the wall using painter’s tape to keep it in place.
2. Roll: Use a mini roller to gently roll the paint onto the stencil.
3. Repeat: Untape the stencil and keep moving it along the wall to get your desired effect.
Step 4: Add Finishing Touches
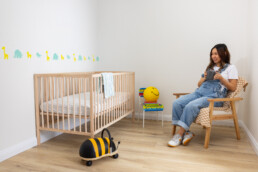
Once the stencils are done, let the paint dry completely before adding any extra decorative touches. You can finish off the nursery with fun accents like:
- An occasional chair in soft textures complement the painted wall.
- Wall decals or framed artwork to enhance the stencilled design and add more visual interest.
Painting for kids is more than just about adding colour to their space—it’s about creating lasting memories and fostering creativity. Whether you’re painting a cubby house or stencilling a nursery wall, these fun projects are a great way to make your home feel more personal, playful, and full of life.
How to Make a House a Home with DIY Projects

Whether you’re new to upcycling or a seasoned DIY pro, the power of paint can help you create a space that truly reflects your style. There’s something magical about a freshly painted object, as it can instantly brighten a corner or add that personal touch that makes a house feel like a home.
In this blog, we’ll dive into two creative and easy ways to make your home feel more inviting, cozy, and uniquely yours: furniture upcycling and painting planter boxes. So, grab your brushes, rollers, and a can of your favourite paint – it’s time to get creative!
Why Upcycle Furniture?
We all have a piece of furniture that’s gathering dust in a corner.
Instead of splurging on a brand-new item, you can transform what you already have into something fresh, fabulous, and functional. Plus, it’s a budget-friendly way to decorate your home without breaking the bank!
Step 1: Choose Your Furniture Piece
It could be an old chair, a wooden dresser, or a stool that just needs a little TLC.
Step 2: Prep
Before you dive into painting, it’s essential to prep the surface. Here’s how:
- Clean: Wipe the piece down with a damp cloth and let it dry completely.
- Sand: Lightly sand the surface to smooth out rough areas, and to help the paint stick better. For wood furniture, this also helps to remove any old finish.
- Undercoat: For a super smooth finish and even colour, apply an undercoat.
Step 3: Paint Away!
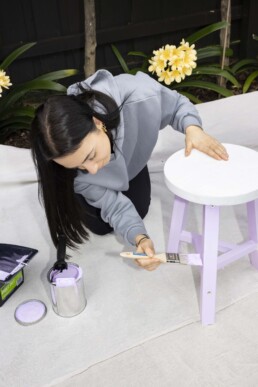
Now comes the fun part – painting!
Use a brush for smaller, detailed areas, and a mini roller for larger flat surfaces. For a smooth, flawless finish, apply two coats.
Step 4: Add Personality
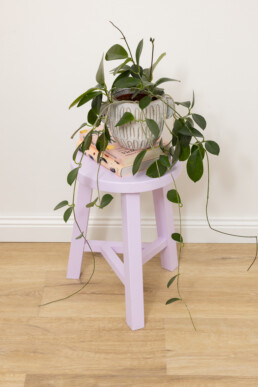
Once the paint is dry, you can take your piece to the next level by adding some creative element to it, whether it’s accessorising it with a nice vase or interesting ceramics.
Painting Planter Boxes
Plants make everything look better – so why not elevate their presentation? Planter boxes are one of the easiest ways to add colour and life to your home, whether indoors or outdoors.
Step 1: Pick the Perfect Planter Box
Look around your home and garden and see if you have any old, plain planter boxes that could use a makeover.
Step 2: Prep
Just like with furniture, the same steps apply when preparing the surface – clean, sand and undercoat!
Step 3: Paint
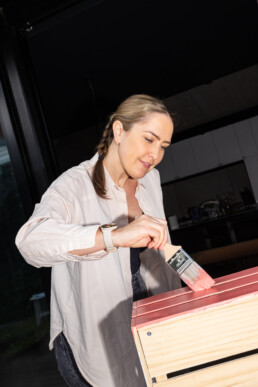
This is where you can get really creative! Here are a few fun ideas:
- Bold, bright colours: Make a statement with a bold colour like turquoise, coral, or mustard yellow. These bright tones can instantly brighten a space.
- Neutral tones: If you prefer a more relaxed vibe, choose calming neutrals like soft greys, whites, or earth tones to complement your plants and decor.
- Add greenery: Plants not only make your home feel more vibrant, but they also purify the air! Fill your newly painted planters with your favourite indoor plants or herbs.
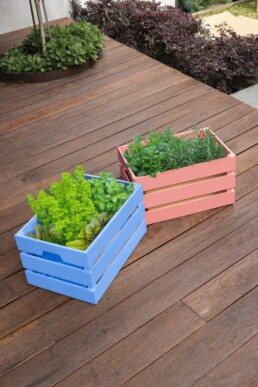
Ready to start your next painting project? We’ve got all the accessories you need to make your house feel like a home.
