DIY Faux Lime Wash: An Affordable Room Makeover
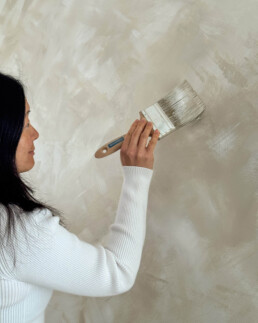
A room makeover doesn’t have to cost a fortune to look high-end. Sometimes, all it takes is a brush, a couple of paint colours, and a little patience. Check out how Velda from @stylingmyinterior updated her space using a clever painting technique and just a few of the right ProRenovator tools.
The result? A gorgeous faux lime wash effect that leaves your walls looking textured, designer-inspired, and full of depth without the price tag or hassle of traditional lime wash! Ready to give it a go? Follow the step-by-step guide below to see exactly how Velda transformed her space into something fresh and full of character.
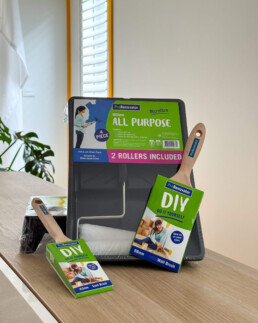
What You’ll Need
- ProRenovator Brushes
- ProRenovator Paint Pots with Liners (x2)
- ProRenovator Measuring Cups
- Two paint colours in separate pots (choose shades that complement each other)
- A little water
Planning & Preparation
First up, pick your colour palette! For a soft, dreamy vibe, go for two shades that are close together, think warm neutrals, gentle greys, or calming pastels. If you’re feeling bold, choose colours that really pop against each other. Try testing a small patch on the wall first to see how your choices play together.
Next, prep like a pro! Make sure your walls are clean, dry, and smooth, and protect skirting boards, trims, and floors with painter’s tape and drop sheets. A little extra prep now means your finished look will be polished, professional, and totally eye-catching.
How to Create the Faux Lime Wash Look
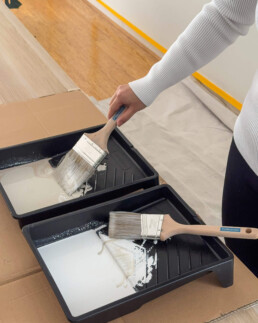
Step 1: Thin the Paint
Add a splash of water to both paint pots for a slightly looser consistency.
Step 2: Load the Brush
Dip one side of your Paint Brush into one colour, then flip and dip the other side into the second colour.
Step 3: Brush It On
Apply the paint to the wall in loose, criss-cross strokes. Keep layering and blending until you achieve the depth and softness you like.
Step 4: Perfect the Edges
You can use a smaller brush around trims and corners for a neat and tidy finish.
Why Try a Faux Lime Wash?
You’re the boss of your walls! Blend the strokes for a soft, dreamy look, or let more brush marks show for a bold, textured vibe. This technique is simple, affordable, and completely DIY-friendly adding subtle movement and a luxe, high-end feel to any room.
The End Result
With just two paints, a splash of water, and your trusty ProRenovator brushes, you can transform your space and give it a whole new personality. It’s proof that small touches can make a big impact, and that DIY can be fun, achievable, and beautifully luxurious. Affordable, creative, and uniquely yours that’s what DIY with ProRenovator is all about.
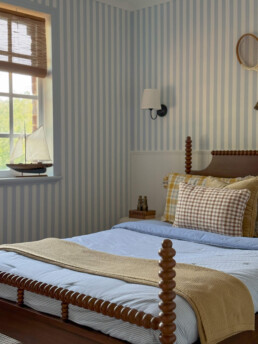
Looking for a fun way to add personality to your space without the cost or commitment of wallpaper? Stripes are a timeless design trick that instantly brings polish, charm, and a playful twist to any room. The best part? With a few ProRenovator tools, this project is budget-friendly, beginner-friendly, and totally achievable to do over the weekend!

What You’ll Need
- ProRenovator Roller Kit 270m
- ProRenovator Microfibre Mini Roller 7PK
- ProRenovator Paint Pot with Liner 100mm
- ProRenovator Metal Extension Pole 1.2m
- Painter’s tape
- Level or measuring tape
- Base paint colour & stripe colour
Planning & Preparation
Before you dive in, choose your stripe style! Want to make your ceilings feel higher? Go vertical. Hoping to stretch out a small room? Horizontal stripes are your best friend. Feeling bold? High-contrast colours like navy and white make a striking statement. Prefer subtle and sophisticated? Tone-on-tone shades can keep it soft but stylish.
Now, let’s prep! Clear out your workspace so you’ve got room to move and nothing in the way or under your feet. Give your walls or cupboards a quick clean so they’re dry and dust-free. And don’t skip the tape, masking trims, skirting boards, and handles is the secret to making sure your painting looks sharp, clean, and totally professional.
How to Paint Perfect Stripes
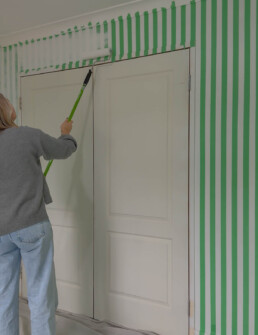
Step 1: Map It Out
Use a quality painter’s tape to outline your stripes. A level can help keep them straight, or you can even use the tape’s width as your measurement.
Step 2: Seal the Tape
For razor-sharp lines, paint over the tape edge with your base colour first. This seals the tape and stops your stripe colour from sneaking underneath the tape.

Step 3: Paint the Stripes
Roll on your stripe colour with the ProRenovator Microfibre Mini Roller it’s perfect for cupboards, trims, and smaller spaces. For those tricky corners and quick touch-ups, the ProRenovator Paint Pot makes painting a breeze. Tackling the full wall? Grab the 270mm Roller Kit with Extension Pole for smooth, even coverage and say goodbye to back strain while you paint like a pro.
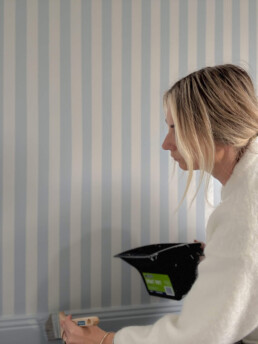
Step 4: Peel & Reveal
Gently pull off the tape for a clean satisfying reveal!
The Big Reveal
That’s it! With just tape, paint, and a few ProRenovator tools, you’ll have crisp, stylish stripes that make a big impact in any room. Affordable, fun, and full of personality! This simple paint hack proves you don’t need wallpaper to totally transform your space.